
Bottled water production: solve one problem
Water Bottle Label Wrinkles and Misalignment: Separate Material, Transfer and Shrink Problems
Replacing a labeler before identifying when the defect first appears can leave the problem unchanged. A sleeve folded before its tunnel, a lifting self-adhesive edge and an OPP overlap error need different evidence.
Confirm the labeling method first. Inspect the same bottle-and-label format at application, after any shrink stage and at finished-pack handling. Compare approved material lots, bottle condition and startup versus steady running before authorizing one controlled change.
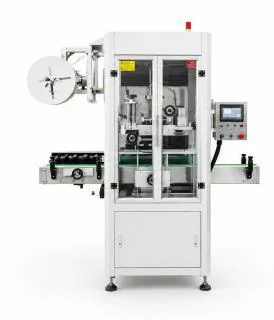
Define a visible defect and a repeatable checkpoint
Record whether the label is a shrink sleeve, reel-fed OPP wraparound or self-adhesive construction. Identify the bottle profile, label drawing/revision, reel or batch, registration mark and required position relative to a named bottle feature. Do not use one method's repair recipe for another.
Photograph the same agreed views before and after the first suspect stage. For sleeves, compare placement before heat with the cooled result. For adhesive routes, record the bottle surface condition and the agreed adhesion/handling observation time. Track changeover and stop/restart separately.
Illustrative counting only: 12 defective labels in 600 inspected bottles is 2%; 6 in another 600 is 1%. Comparable counts help evaluate a change but neither percentage is a recommended rejection limit. Classify wrinkles, skew, lifting and unreadable code separately; one bottle with two defects is still one bottle in the bottle-level rate.
Locate the first defective stage by label method
If the bottle turns or the label is rubbed only after labeling, inspect the conveyor and packing handoff. A finished-pack photo alone cannot prove the labeler created the defect.
| First visible finding | Evidence to compare | Scope to investigate |
|---|---|---|
| Sleeve is already folded, tilted or at the wrong height before heat | Cut length, sleeve/bottle dimensions, registration and application-stage samples | Sleeve feed, opening/application and bottle transfer before tunnel adjustment |
| Sleeve sits correctly but distorts after shrinking | Approved film lot, profile, tunnel record, entry/exit orientation and cooled samples | Film–bottle–thermal route, reviewed against supplier instructions |
| Self-adhesive label bubbles or lifts at an edge | Bottle moisture/condensation, surface condition, label lot and observation age | Material suitability and contact/application consistency; no heat-tunnel remedy assumed |
| OPP label overlap or position changes | Label length/register, overlap samples, bottle rotation and approved bonding record | Roll feed, cutting, transfer and bonding interface, not sleeve shrink settings |
Retest the cause without mixing variables
Never bypass guards or put hands near moving feed rollers, cutters, hot glue or a tunnel. Do not copy a universal temperature, speed, tension or adhesive quantity from this guide. Heated and mechanical work requires qualified personnel and the actual supplier's instructions.
- 01
Preserve the original recipe, good/bad samples and lot identities. Select one bottle and label format with agreed visual and code-readability criteria.
- 02
Observe the first defective stage safely from outside guards. Compare approved material and bottle-condition evidence before touching machine parameters.
- 03
Let authorized personnel review format parts, transfer and the relevant application route. Change only one permitted material or setting variable and document its old/new state.
- 04
Repeat matched startup, stable-run and stop/restart observations. For sleeves inspect the cooled outcome; for adhesive labels use the agreed dwell/handling conditions.
- 05
Verify downstream rubbing, pack appearance and readable product code, plus the inspection/reject response. Release the revised format only through the site's quality procedure.
Specify the corrective scope from the evidence
If the problem follows one film or adhesive lot, confirm the material before buying a faster labeler. A repeatable application-stage defect may require service, format parts or a revised bottle transfer. A defect appearing only after packing belongs in the downstream review.
For a machinery change, require approved bottle/label samples, the actual labeling method, position and appearance criteria, code location, interface conditions and a controlled acceptance test. Keep sleeve/tunnel capability separate from OPP and self-adhesive options in the quotation.
- Machine model/serial and actual labeling method
- Bottle drawing/profile and label construction, dimensions and revisions
- Reel or batch codes and retained good/bad samples
- Photos at application, after shrinking if present, and downstream handling
- Recipe, permitted changes, timed defect counts and restart observations
- Agreed position, adhesion/appearance, code and rejection criteria
Questions buyers ask
Will more tunnel heat remove sleeve wrinkles?
Not necessarily. If the sleeve is folded or misplaced before entering the tunnel, raising heat does not isolate the application fault. Confirm the film and bottle pair, compare pre/post-tunnel samples and authorize changes only within the supplier-approved process.
Why are labels straight at the labeler but crooked in the finished pack?
First confirm the same identified bottles were compared. If the first displacement appears later, examine conveyor contact, accumulation and packing handling. Include that handoff in the test scope instead of changing the labeler based only on final-pack appearance.
Related troubleshooting guides
Water filling machine low output
Water filling machine low output →Water bottle shrink-pack problems
Water bottle shrink-pack problems →Cap leaks after capping
Cap leaks after capping →Ask Allot Tech to review the evidence
Send your machine identification, package drawing and timed observations. State what is unknown so the proposed scope follows the actual problem.